

Before You Import
Your import file should:- Be saved as a CSV with UTF-8 encoding
- Include a header/title for each column
- Have first and last names in separate columns
- Include the appropriate mobile phone number for each contact
- Be reviewed for duplicate, incomplete, or inaccurate information
Preparing Your CSV
Captivated allows you to map information from your spreadsheet to fields within a contact record. Available fields include:- Prefix
- First Name
- Last Name
- Suffix
- Salutation
- Company Name
- Phone Number
- Tags
- Notes
Separate First and Last Names
First and last names should be stored in separate columns. This is especially important when using merge fields such as{{salutation}}, which allows Captivated to personalize a message using only the contact’s first name.
If your spreadsheet has a single Full Name column:
- Insert an empty column next to the name column.
- Select the name column.
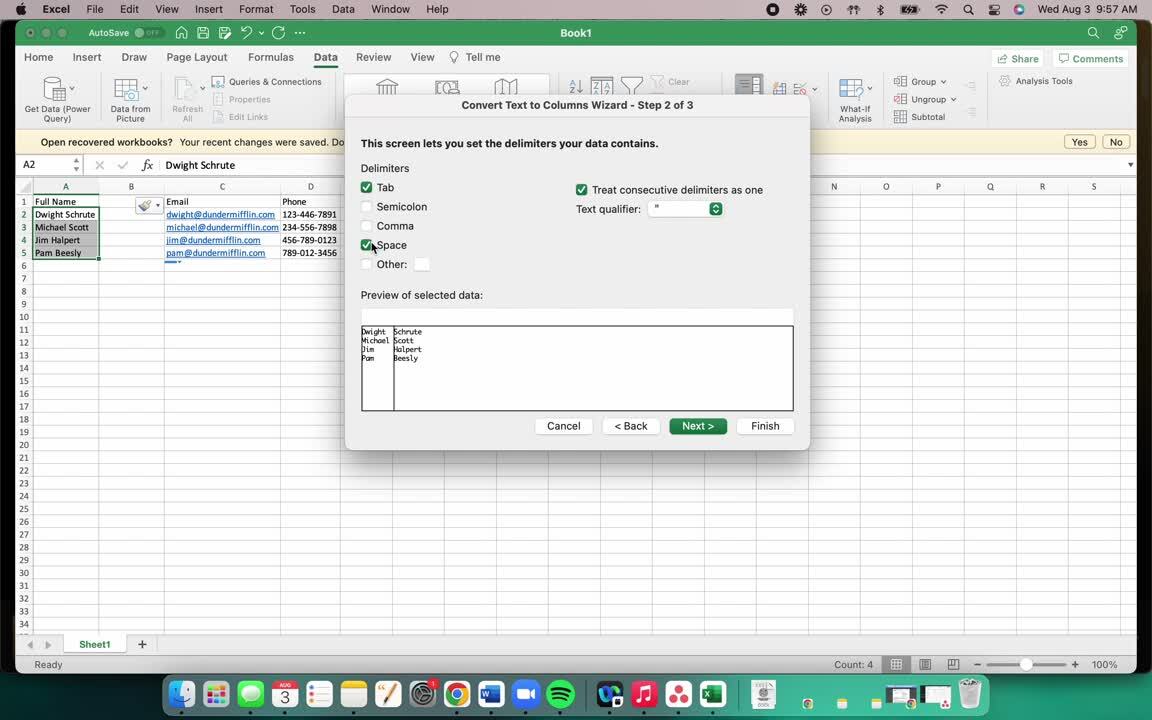
- In Excel, select Data → Text to Columns.
- Choose Delimited.
- Select Space as the delimiter.
- Select Finish.
Fix Names in ALL CAPS
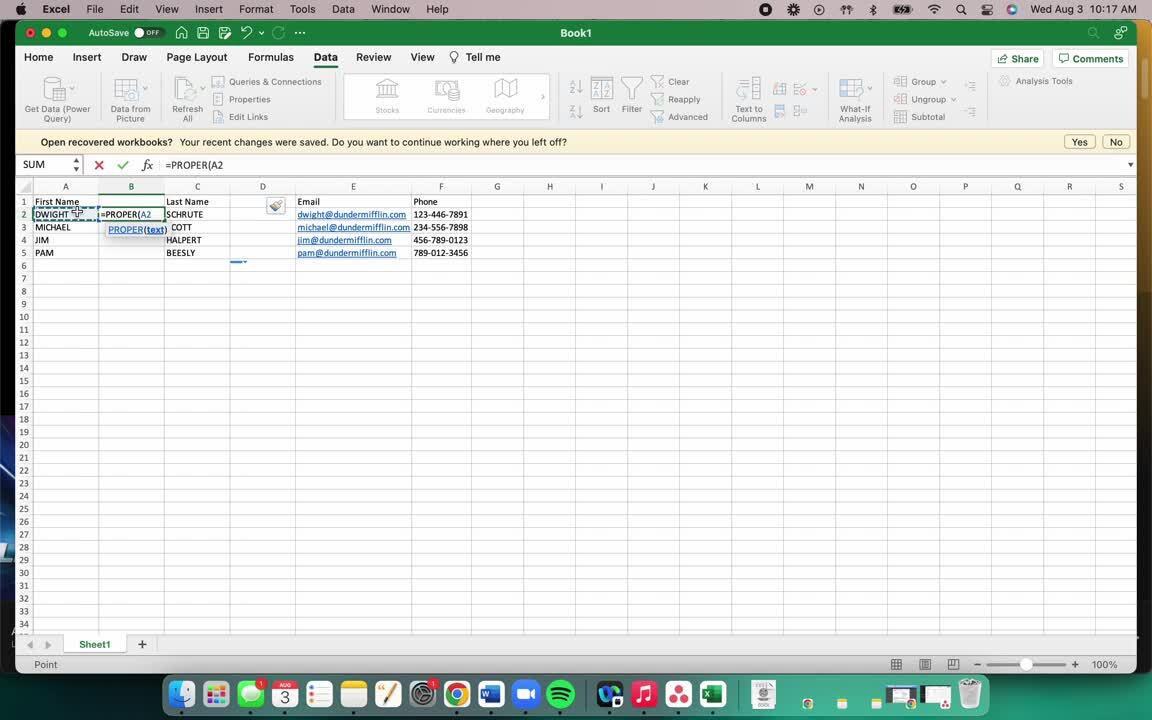
If names are formatted in all capital letters, Excel’sPROPER formula can make them easier to use in personalized messages.
For example:
MICHAEL SCOTT → Michael Scott
- Insert a new column next to the existing name column.
- Enter the
PROPERformula referencing the appropriate cell. For example:=PROPER(A2) - Press Enter.
- Drag the formula down to apply it to the remaining contacts.
Hi {{salutation}} from displaying as Hi MICHAEL.
Choose a Mobile Number When Multiple Numbers Exist
Your source file may contain several phone-number fields, such as:- Mobile Phone
- Home Phone
- Business Phone
- Preferred Phone
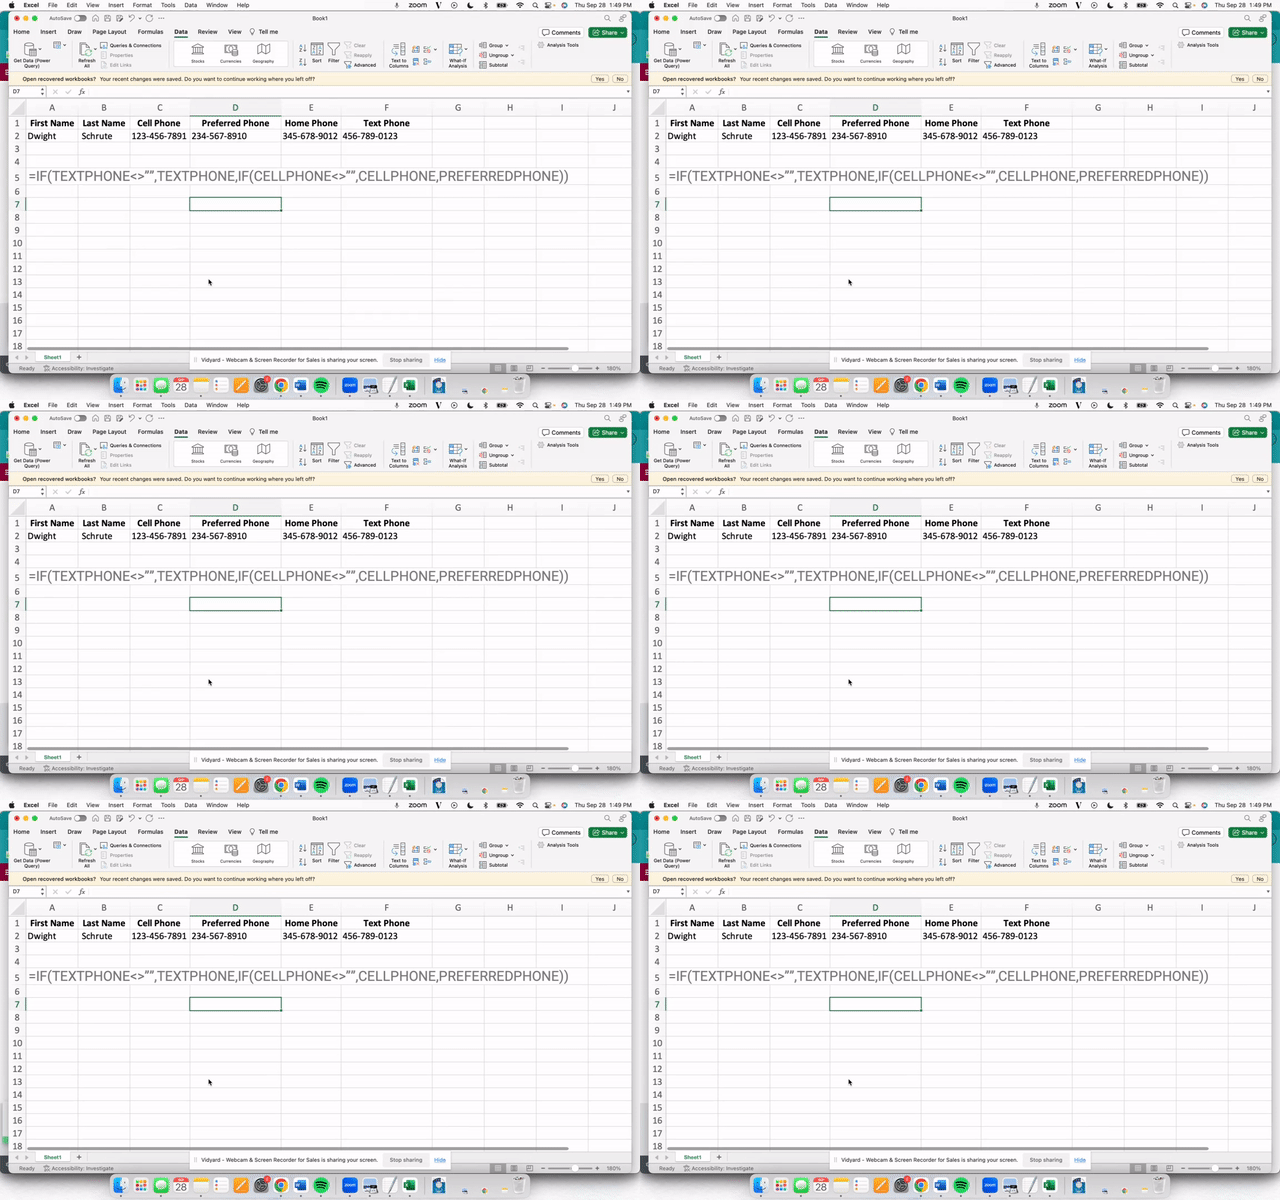
IF formula to create a single Import Phone column based on the order in which you’d like Excel to look for an available number.
For example:
=IF(AM2<>"",AM2,IF(AK2<>"",AK2,AH2))
This tells Excel to use the first available value from the phone-number columns you’ve specified.
Remove Names or Other Text from Phone Numbers
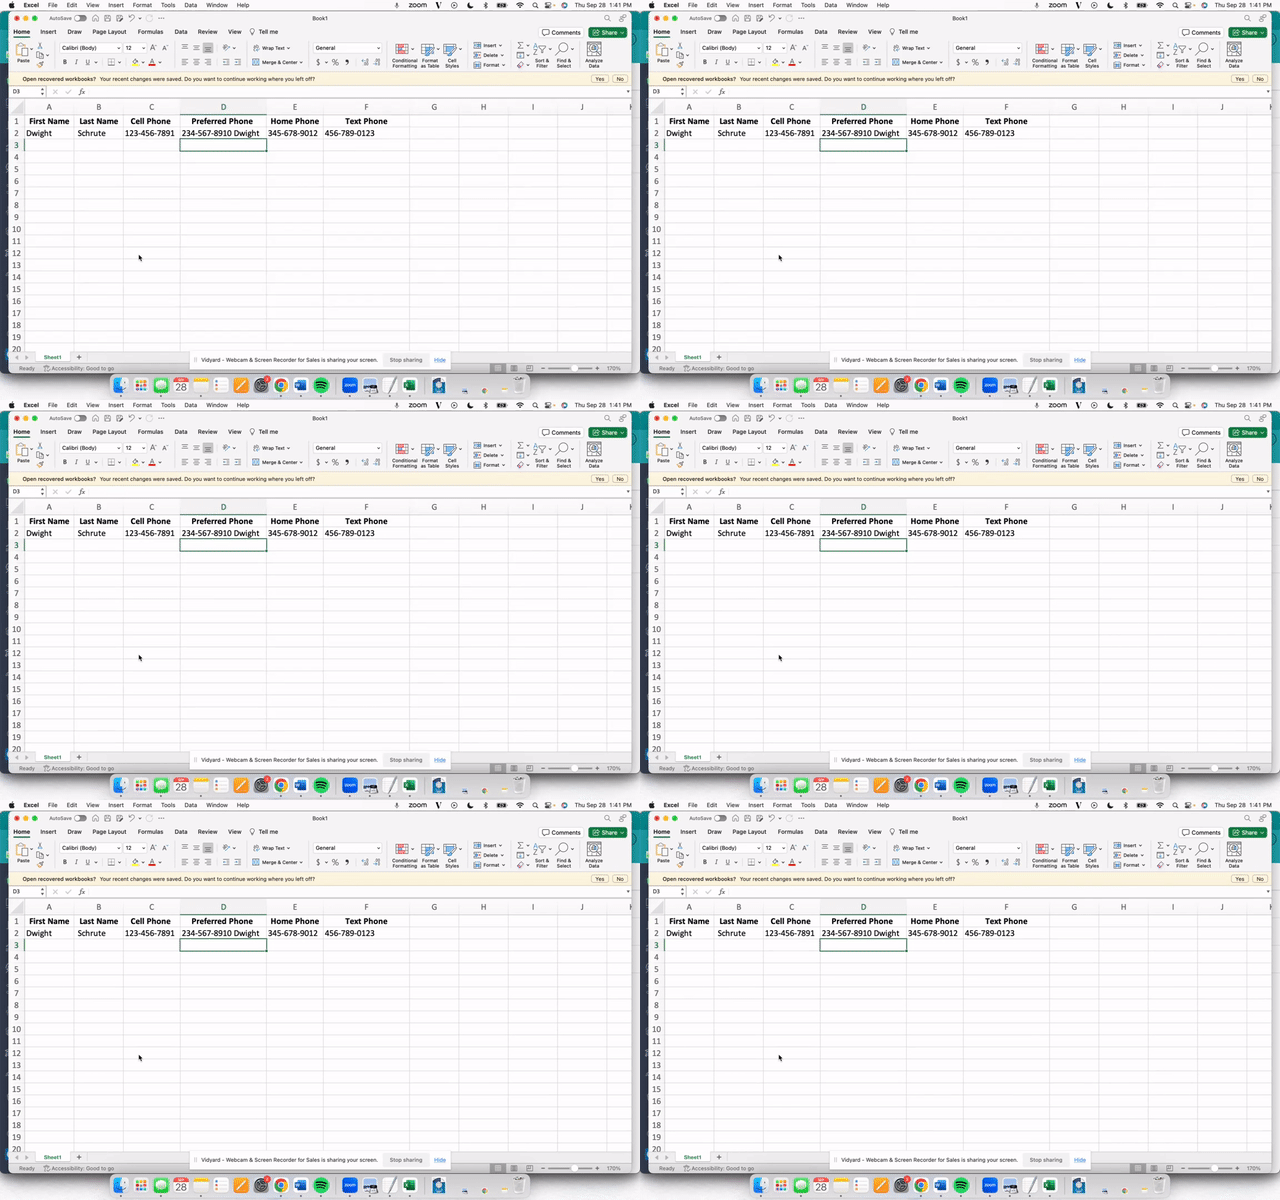
Phone-number fields should contain phone numbers rather than names or other text. If your source data includes additional information in the same column:- Select the affected column.
- Navigate to Data → Text to Columns.
- Choose Fixed Width.
- Set the break immediately after the phone number.
- Complete the split and review your results.
Administrator Contact Import Video Walkthrough
Import Your Contacts
Where you access Contact Import depends on your Captivated permissions. Administrators: Navigate to Administration → Import Contacts. Users with Contact Import permission: Navigate to Contacts and select the option to import contacts. Select your prepared CSV file to begin.
If your organization uses Contact Ownership, you’ll also have the option to configure ownership during the import.
Select your prepared CSV file to begin.
If your organization uses Contact Ownership, you’ll also have the option to configure ownership during the import.
Map Your Columns
After uploading your CSV, map each column in your spreadsheet to the corresponding Captivated contact field. For example:
Updating Existing Contacts
During your import, pay close attention to the options for handling contacts that already exist in Captivated. Depending on the information being imported, you’ll have options to update or not import existing information. You’ll also need to determine how Captivated should handle existing Tags and Notes.
Add vs. Replace
Add keeps the contact’s existing information and adds the information from your CSV. Replace removes the existing information for that field and replaces it with the information contained in your CSV. Take a moment to review these selections before starting the import.Complete the Import
Once you’ve:- Uploaded your CSV
- Mapped your columns
- Reviewed how existing contacts should be handled
- Reviewed your Tags and Notes settings
- Configured Contact Ownership, if applicable
Giving a User Contact Import Permission
Administrators can allow non-Administrator Users to import contacts. Navigate to: Administration → Users → Select User → Edit → Advanced Settings → Contact Import Enable Contact Import and save your changes. The User can then access the import functionality from the Contacts section.Non-Administrator Contact Import Video Walkthrough

Frequently Asked Questions
Why am I seeing odd symbols or text after selecting my file?
Why am I seeing odd symbols or text after selecting my file?
Make sure your spreadsheet is saved as a CSV with UTF-8 encoding, rather than an Excel
.xlsx file.In Excel, use Save As and select the appropriate CSV UTF-8 file format before trying the import again.Why didn't my contacts import?
Why didn't my contacts import?
First, check that:
- Your CSV has column headers.
- First Name, Last Name, and Phone Number are mapped correctly.
- Your phone-number column doesn’t contain letters or other invalid information.
- The fields containing the information you want imported were mapped during the import.
What is a Tag?
What is a Tag?
Tags help organize and group contacts in Captivated. They can also be used to build recipient audiences for Announcements.
Why don't I see Contact Ownership?
Why don't I see Contact Ownership?
Contact Ownership is not enabled for every Captivated organization.If your organization would like to use Contact Ownership, contact your Captivated Administrator or Captivated Support.
Why don't I see the option to import contacts?
Why don't I see the option to import contacts?
Contact Import is permission-based.If you’re not an Administrator and don’t see the import option, ask your Captivated Administrator to enable Contact Import under your User’s Advanced Settings.